

Mac Screenshot Clipboard Shortcut
![]()
macOS provides a handy shortcut for capturing everything displayed on your Mac's screen as an image file, And with special keyboard combinations, you can take a screenshot of the whole screen or capture a smaller area like a window or the menu bar. macOS even lets you take timed screenshots, change the location, default name and file format for your screenshots and more.
But did you know you can capture a screenshot directly to the clipboard?
This quick tutorial explains how to use a modifier key to save a screenshot directly to the clipboard for quick pasting in other apps—even on other devices, provided you use Universal Clipboard.
Screenshot-taking shortcuts
Here's a quick reminder of macOS's two basic screenshot-taking keyboard shortcuts:
- Shift (⇧)-Command (⌘)-3: take a screenshot of the whole screen
- Shift (⇧)-Command (⌘)-4: take a screenshot of part of the screen
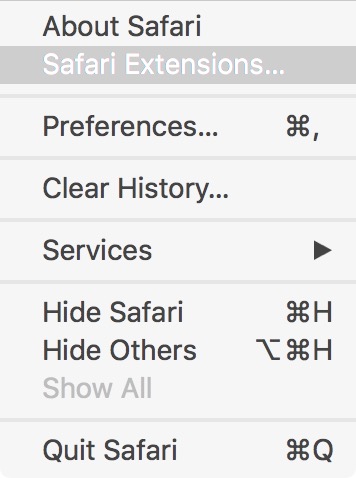
To take a screenshot of any menu, the Mac's menu bar or a window, pressShift (⇧)-Command (⌘)-4, then hit the Space Bar . Move the pointer over an item to highlight it, then click the mouse/trackpad to capture only the selected item.
Here's an example screenshot of the Safari menu.
You can also take pictures of the screen using the stock Grab app.
How to capture Mac screenshots directly to clipboard
Screenshots are normally saved as images in the PNG file format on your desktop. Thankfully, pressing a modifier key while taking a screenshot passes the image to the system clipboard so you can paste it in other documents.
Press the Control (⌃) key on the keyboard, then hold either the Shift (⇧)-Command (⌘)-3 combination to take a screenshot of the entire screen or the Shift (⇧)-Command (⌘)-4 shortcut if you want to send an image of part of the screen to the clipboard.

The ability to save Mac screenshots directly to the system clipboard is a tremendously handy feature, especially when used with Universal Clipboard in iOS and macOS.
Screenshots and Universal Clipboard
With Universal Clipboard, you can copy content from an app on one device and paste it into another app on a different device simply by using standard Copy/Paste commands like you normally would. As long as your devices use the same iCloud account, have Wi-Fi enabled and are within Bluetooth range, Universal Clipboard "just works".
Capturing a screenshot directly to your Mac's clipboard means you can elegantly avoid AirDrop, iCloud Photo Library and other means of sending screenshots between devices back and forth. For example, I captured a screenshot of my Mac's desktop to the clipboard as I wanna use it in a Pages document I'm working on my iPhone.

After taking the screenshot on my Mac with the Control modifier key, I then launched a Pages document on my iPhone, tapped the placeholder image and selected Paste from the popup menu. Remember that it may take a second or two for the menu to appear after tap-and-holding as the devices establish an ad-hoc direct connection.
Depending on the size of the item in the clipboard, the process of pasting content between devices can take a few seconds to complete. A handy progress indicator appears on the screen, similar to the one when transferring content using AirDrop.
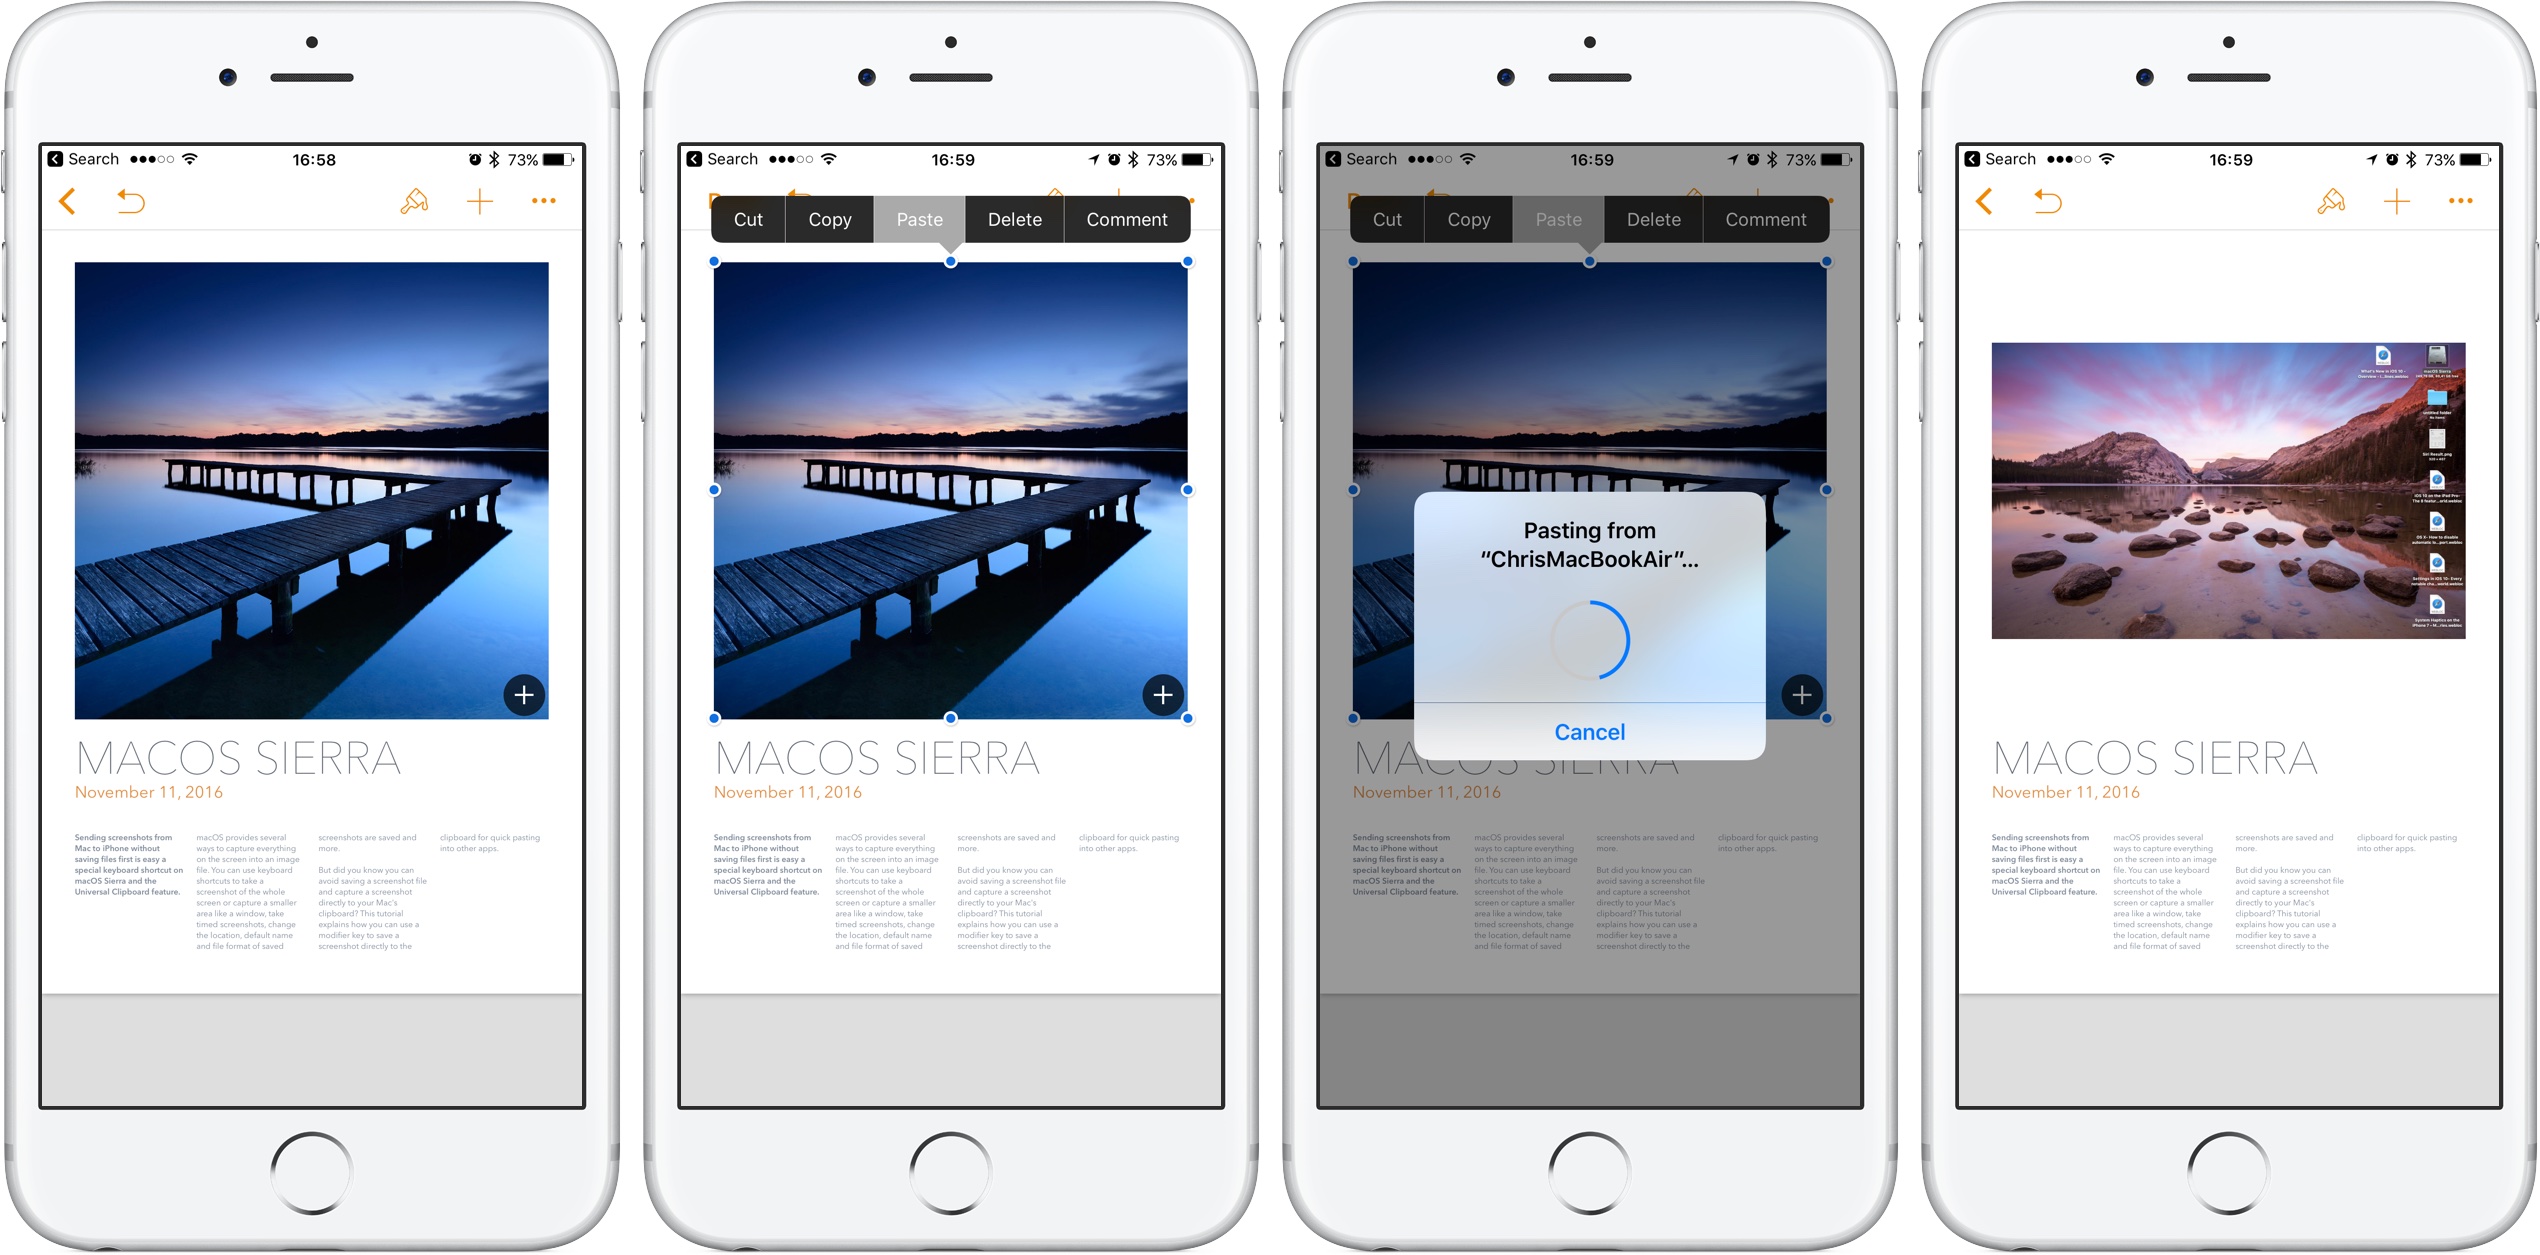
And just like that, the screenshot of my Mac's desktop was pasted in the Pages document on my iPhone. Yes, I could have saved the screenshot on my Mac's desktop and used AirDrop to shoot it to my iPhone for use in the Pages document.
For situations like this, I prefer the Universal Clipboard method instead of AirDrop because AirDrop would have saved the image in the Camera roll, triggering Photos to push it to my other devices via iCloud Photo Library.
More about taking screenshots on Mac
To learn even more about the various ways of taking screenshots on your Mac, changing their file format and default location and more, see our previous tutorials:
- Various ways of taking screenshots
- Taking timed screenshots
- Changing where screenshots are saved
- Changing file format for screenshots
- Removing date and time from screenshot names
- Adjusting default file name for screenshots
Feel free to share your favorite screenshot tricks in the comment section below.
Like this tip?
Having your screenshots sent directly to the system clipboard is great if you want to immediately paste the image into other commands with the Edit → Paste menu item.
It's especially great if contents of your Mac's desktop are being synchronized with your other devices through iCloud and you want to avoid screenshot syncing but cannot possibly be bothered to run a quick Terminal command to change the location where screenshots are saved to a custom folder.
If you like this tip, please pass it along to other people and share the article with friends and family on social media. Submit your ideas regarding our tutorial coverage at tips@idownloadblog.com.
Mac Screenshot Clipboard Shortcut
Posted by: byersmestled.blogspot.com
Source: https://www.idownloadblog.com/2016/11/11/how-to-save-mac-screenshots-directly-to-the-clipboard/
0 Response to "Mac Screenshot Clipboard Shortcut"
Post a Comment